
Quick Answer
To remove a tub spout with no set screw, cut the caulk bead, then turn the spout counterclockwise because it is threaded onto a 1/2-inch pipe nipple. Use your hands, a strap wrench, or a screwdriver handle inside the spout opening for leverage. It takes 10 to 20 minutes. Stop if the pipe behind the wall starts twisting.
Key Takeaways
- A tub spout with no set screw is almost always a threaded spout that unscrews counterclockwise.
- Check the underside with a flashlight first; a hidden 1/8-inch or 3/32-inch Allen screw means it is a slip-on spout.
- Cut old caulk at the wall before turning, or the spout can bind and scratch the tile.
- A strap wrench or a wooden handle inside the spout gives leverage without crushing the finish.
- Brace or watch the pipe nipple; if it twists inside the wall, stop and reassess.
- Wrap the clean nipple threads with 3 to 4 turns of PTFE tape before installing the new spout.
If you are trying to remove a tub spout with no set screw, the good news is that the job is usually simpler than it looks. Spouts without a screw underneath are threaded, so the whole body turns off like a big nut. The steps below show how to break it loose without damaging the finish, the tile, or the plumbing hidden in the wall.
What You’ll Need
- Flashlight and a small inspection mirror
- Utility knife or plastic caulk-removal tool
- Rubber jar-opener grip or rubber dishwashing gloves
- Strap wrench (rubber strap, 6 to 12 inches)
- Large flathead screwdriver, wooden dowel, or hammer handle that fits inside the spout opening
- Painter’s tape and a towel to protect tile and the tub floor
- Penetrating oil or white vinegar (optional, for corroded threads)
- Hair dryer (optional, to soften old plumber’s putty or caulk)
- PTFE thread tape and 100% silicone caulk for reinstalling
- Pipe wrench, 10-inch (optional, for holding a loose nipple)
How To Remove a Tub Spout With No Set Screw: Step-by-Step
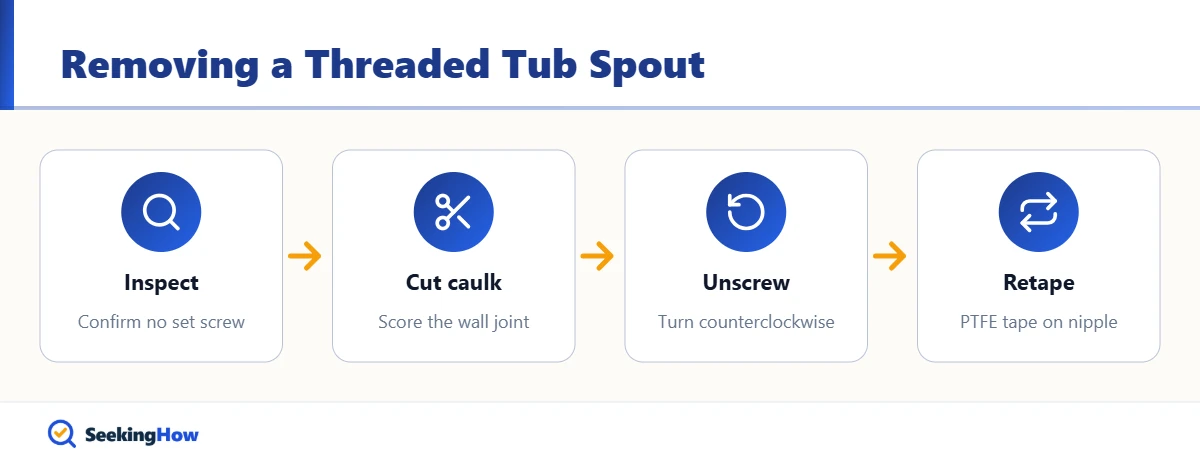
Step 1: Confirm There Really Is No Set Screw
Lie down in the tub and inspect the underside of the spout near the wall with a flashlight and a mirror. Many slip-on spouts hide a tiny Allen screw in a recess, sometimes filled with grime or caulk. Run a fingertip along the bottom; if you feel a small hole, loosen that screw instead of twisting, because forcing a slip-on spout can tear its internal O-ring or clamp.
Step 2: Cut the Caulk Bead at the Wall
Score all the way around the joint between the spout and the tile with a utility knife held flat against the spout. Old caulk acts like glue and is the main reason a threaded spout refuses to turn. Avoid prying the blade into the wall cavity, which can chip glazed tile.
Step 3: Protect the Tub and Tile
Lay a folded towel in the tub under the spout and run painter’s tape on the tile around it. If a tool slips, the tape and towel take the hit. In practice, most chips happen at this stage when a wrench jumps off a stubborn spout.
Step 4: Turn the Spout Counterclockwise by Hand
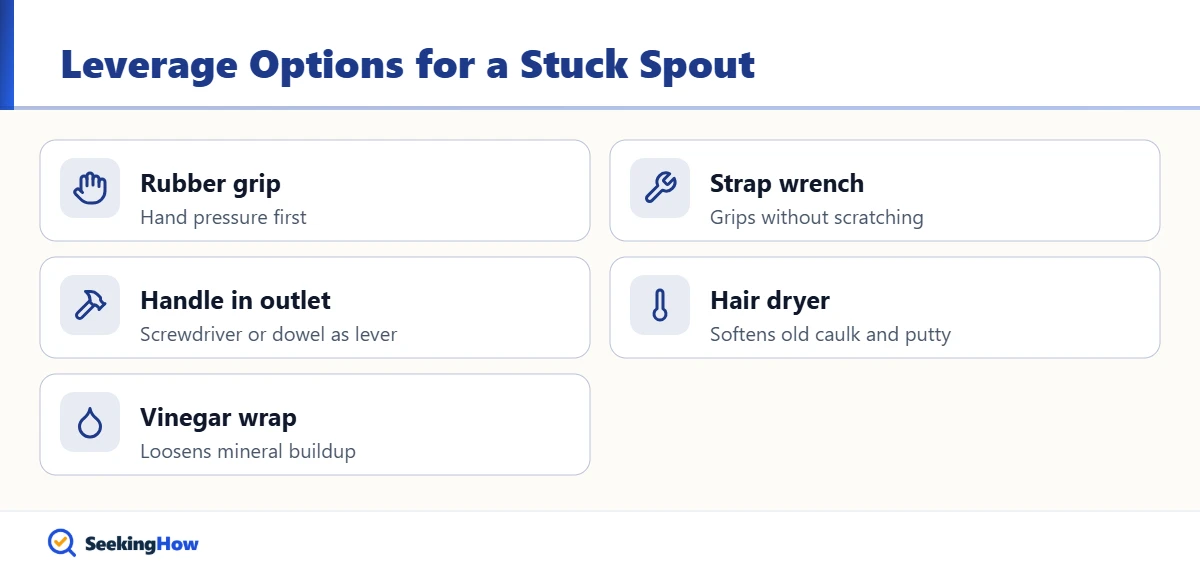
Grip the spout with a rubber jar opener or gloves and turn it counterclockwise as viewed from the front. Many spouts loosen with firm hand pressure alone. If it moves a little and stops, work it back and forth a quarter turn at a time.
Step 5: Add Leverage Without Crushing the Spout
Slide a large screwdriver handle, wooden dowel, or hammer handle into the spout outlet and use it as a lever to turn counterclockwise. Alternatively, wrap a strap wrench around the body. Do not clamp a bare pipe wrench on a zinc or plated spout; it will crush or scar it.
Step 6: Free a Corroded or Stuck Spout
If the spout will not budge, warm it with a hair dryer for 2 to 3 minutes to soften old putty and caulk, then try again. For mineral buildup, wrap a vinegar-soaked rag around the joint for an hour. Most people find that steady pressure works better than sudden jerks, which can snap a corroded nipple.
Step 7: Watch the Pipe Nipple as It Comes Off
As the spout unthreads, check that the exposed pipe nipple is not turning with it. If it is, hold the nipple with a pipe wrench through the opening once there is room, or stop and call a plumber if it is copper soldered to a fitting. A twisting nipple can loosen the drop-ear elbow inside the wall and cause a hidden leak.
Step 8: Clean and Inspect the Threads
Wipe the nipple threads clean with a rag and a nylon brush. Measure how far the nipple projects from the finished wall; most replacement threaded spouts need roughly 1/2 inch to 1-1/2 inches of exposed thread, so check the instructions of the spout you buy. Before installing, wrap 3 to 4 turns of PTFE tape clockwise on the threads.
Bottom line: if you find no set screw after a careful look, treat the spout as threaded, cut the caulk, and turn it counterclockwise with a strap wrench or a handle inside the opening.
Threaded vs. Slip-On Tub Spouts
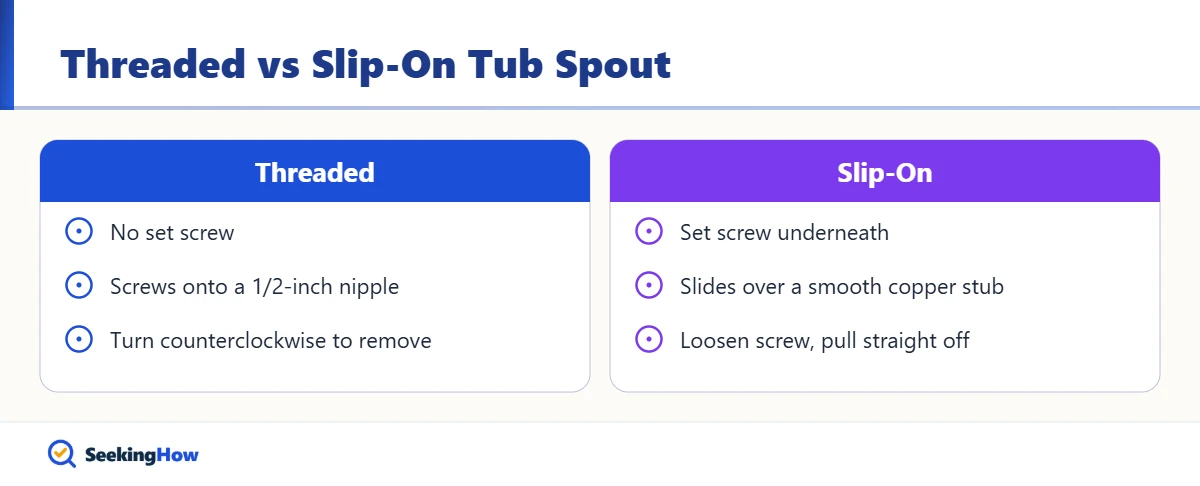
| Feature | Threaded spout | Slip-on spout |
|---|---|---|
| Set screw | None | Under the spout, near the wall |
| Pipe behind it | Threaded 1/2-inch nipple | Smooth copper or brass stub |
| How to remove | Turn counterclockwise | Loosen screw, pull straight off |
| Common mistake | Twisting the nipple loose in the wall | Twisting instead of pulling |
If That Didn’t Work
Problem: The spout spins but will not come off. Cause: It is a slip-on spout with a stripped or missed set screw. Fix: Look again underneath; if the screw is stripped, use a screw extractor or ask a plumber.
Problem: The spout will not turn at all. Cause: Corrosion, old caulk, or pipe dope that has hardened. Fix: Recut the caulk, apply heat or vinegar, and use a longer handle inside the spout for leverage.
Problem: The whole pipe turns with the spout. Cause: The nipple is threaded more tightly into the spout than into the elbow behind the wall. Fix: Stop, hold the nipple with a pipe wrench, or remove the nipple and spout together and replace both.
Problem: Water drips from the wall after removal. Cause: The valve is passing water or the nipple joint loosened. Fix: Shut off the house water and see our guide on a tub spout leaking from the back.
Safety and When To Call a Pro
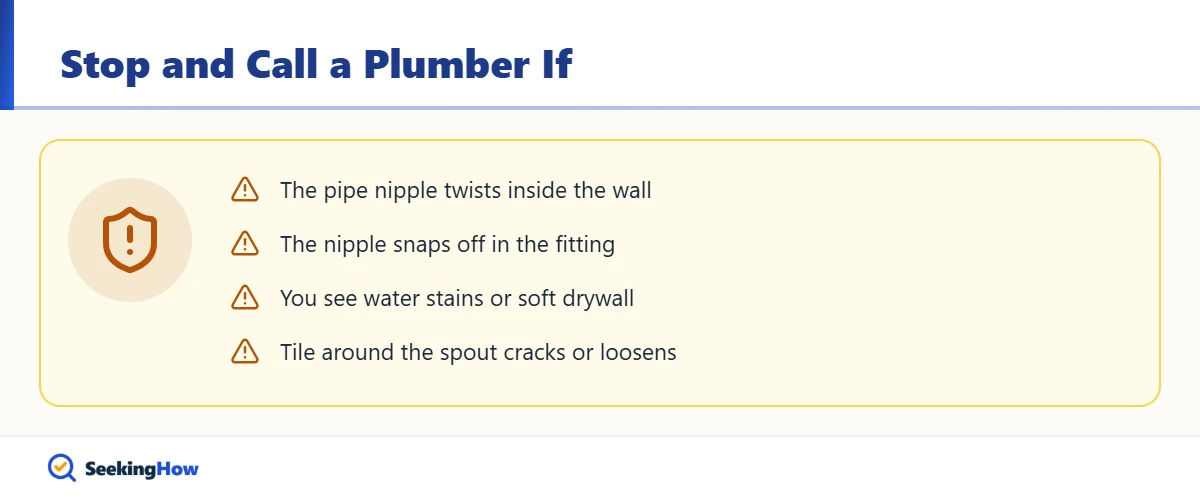
Call a plumber if the nipple is copper soldered into a fitting and begins to twist, if you see water stains or soft drywall around the spout, or if the nipple snaps off inside the elbow. Those repairs often need an access panel or opening the wall. Also stop if the tile around the spout cracks or loosens, since water will get behind it.
Prevention Tips
- Use only PTFE tape or a thin coat of pipe dope on spout threads; never glue a spout on.
- Seal the top and sides of the spout to the wall with silicone and leave a small gap at the bottom so water can drain out.
- Clean hard-water buildup at the outlet every few months to keep the diverter working.
- While the spout is off, it is a good time to clear a slow bathtub drain as well.
Related Guides
- Tub Spout Leaking From the Back: Causes and Fixes
- How To Unclog a Bathtub Drain
- How To Install a Fiberglass Bathtub
- How To Fix a Crack in a Plastic Bathtub
Sources
- Moen, tub spout installation and support resources (moen.com)
- Delta Faucet, tub spout replacement parts and instructions (deltafaucet.com)
- Kohler, bath spout installation guides (kohler.com)
Frequently Asked Questions
How do I know if my tub spout is threaded or slip-on?
A tub spout with no set screw on its underside is threaded. Check with a flashlight and mirror, because the screw can be tiny and hidden by grime. You can also look inside the spout outlet with a light; a threaded spout shows the end of a threaded pipe nipple, while a slip-on spout covers a smooth copper stub.
Which way do you turn a tub spout to remove it?
Turn a threaded tub spout counterclockwise, as viewed facing the wall, to remove it. That is the standard righty-tighty, lefty-loosey direction. If it does not move, cut the caulk again and add leverage with a strap wrench or a screwdriver handle inside the outlet rather than pushing harder by hand.
Can I use a pipe wrench on a tub spout?
Only as a last resort, and only with heavy padding. Bare pipe wrench jaws crush zinc spouts and scar chrome finishes. If you plan to throw the old spout away anyway, a padded pipe wrench is acceptable, but keep the pipe behind the wall from twisting as you turn.
What if the pipe comes out with the tub spout?
If the nipple unscrews from the elbow inside the wall, you can usually reinstall a new brass nipple with PTFE tape. Thread it in snugly by hand and then about one more turn with a wrench. If the nipple broke or the elbow is loose or leaking, call a plumber.
Do I need to turn off the water to remove a tub spout?
No, you do not need to shut off the water simply to remove a tub spout, because the valve controls flow. Make sure the tub valve is fully closed. If water drips from the nipple after removal, the valve cartridge is passing water and should be repaired.
How long should the pipe nipple be for a new tub spout?
The required nipple length depends on the spout model, so check its instructions before buying. Many threaded spouts need between about 1/2 inch and 1-1/2 inches of thread exposed beyond the finished wall. Too short and the spout will not seat; too long and it will not reach the wall.
Should I caulk around a new tub spout?
Yes, seal the top and sides of a new tub spout to the wall with 100% silicone caulk. Many plumbers leave a small gap at the bottom so any water that gets behind the spout can drain out instead of soaking the wall.