Quick Answer
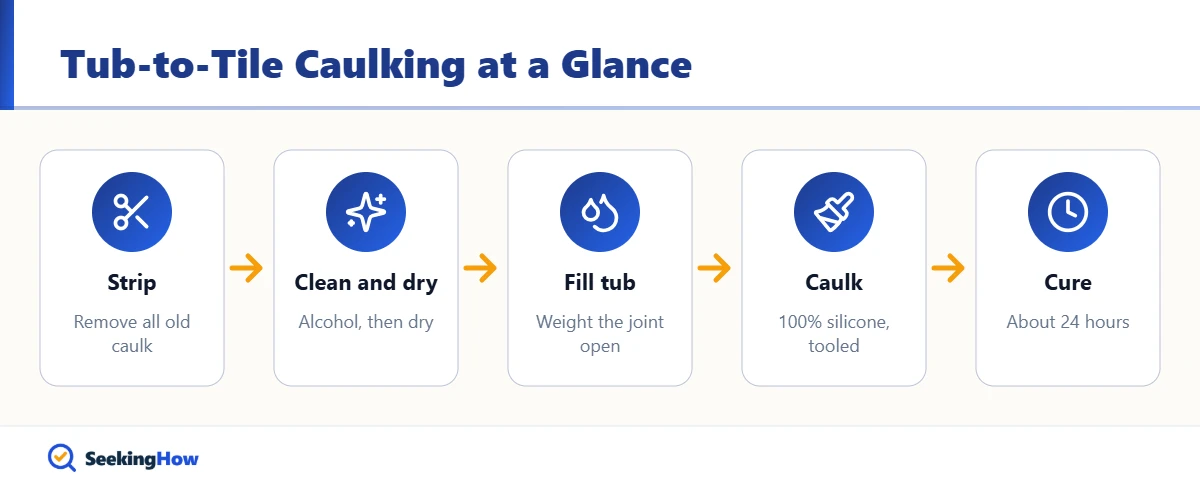
To caulk a fiberglass tub to a tile wall, remove all old caulk, clean the joint with isopropyl alcohol, and let it dry. Fill the tub with water so it settles, tape both edges, then run a bead of 100% silicone kitchen-and-bath caulk and smooth it. Remove the tape right away and leave the water in until the caulk cures, usually 24 hours.
Key Takeaways
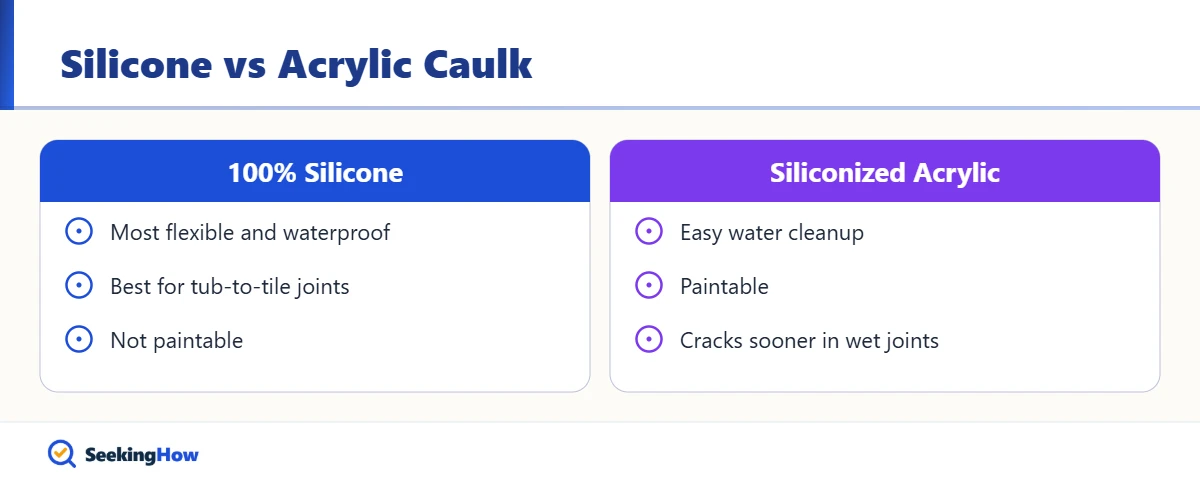
- 100% silicone bonds and flexes better than acrylic caulk on a fiberglass tub-to-tile joint.
- Filling the tub with water before caulking stops the joint from tearing when someone stands in it.
- Every trace of old silicone must come off, because new silicone does not stick to old silicone.
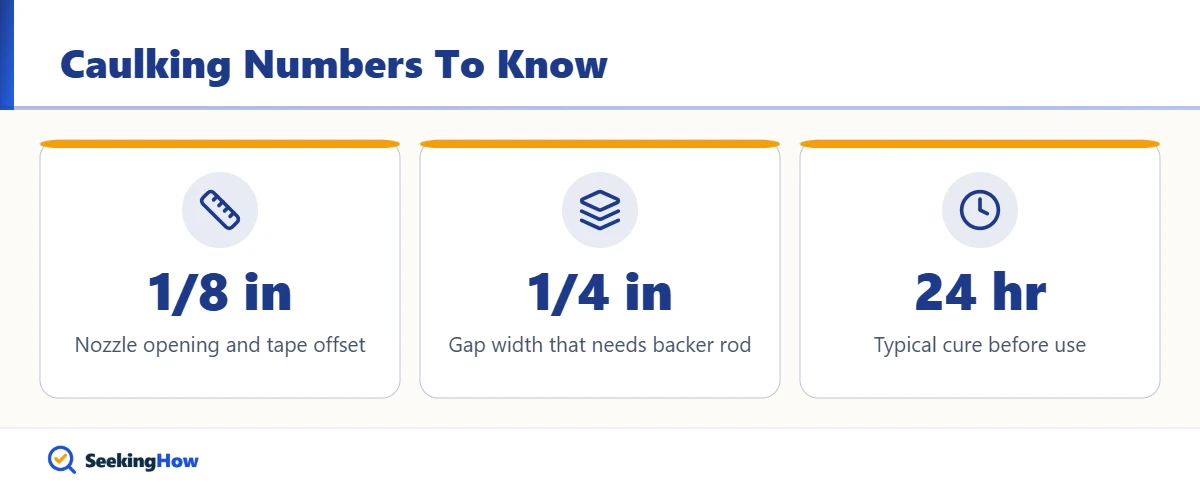
- Gaps wider than about 1/4 inch need foam backer rod before caulking.
- Pull the painter’s tape while the caulk is still wet, within a few minutes of tooling.
The joint where a fiberglass tub meets tile moves every time the tub fills, which is why it cracks and molds faster than other joints. Learning how to caulk a fiberglass tub to a tile wall the right way, with the tub weighted and the right sealant, gives you a seal that stays tight for years. Plan on about an hour of work plus a full day of cure time.
What You’ll Need
- 100% silicone caulk labeled for kitchen and bath, mildew resistant, in white or clear (one 10-ounce tube covers a standard 5-foot tub)
- Caulk gun with a smooth, dripless trigger
- Plastic caulk-removal tool and a utility knife or razor scraper
- Silicone caulk remover (optional, for stubborn residue)
- Isopropyl alcohol, 70% or stronger, and lint-free rags
- Blue painter’s tape
- Caulk smoothing tool or a gloved fingertip
- Foam backer rod, 3/8 inch (optional, for wide gaps)
- Fan or dehumidifier (optional, to speed drying)
How To Caulk a Fiberglass Tub to a Tile Wall: Step-by-Step
Step 1: Remove All Old Caulk
Slice along both edges of the old bead and pull it out with a plastic removal tool. Scrape remaining film with a plastic tool on the tub and a razor only on the tile, since metal scratches fiberglass. New silicone will not bond to old silicone, so any leftover residue means early failure.
Step 2: Clean and Kill Mildew
Wipe the joint with isopropyl alcohol to remove soap film and silicone residue. If you see black mildew in the grout line, clean it with a diluted bleach solution, rinse, and let it dry. Never mix bleach with ammonia or acid cleaners.
Step 3: Let the Joint Dry Completely
Leave the area to dry for several hours, ideally overnight, with a fan running. Moisture trapped in the gap prevents adhesion and feeds mold under the new bead. Most people find this is the step they rush.
Step 4: Fill the Tub With Water
Fill the tub close to the overflow. The water weight pulls the tub down to its loaded position, so the caulk cures at the joint’s widest point and is not stretched later. Skipping this is the main reason a fresh bead tears within weeks.
Step 5: Tape and Fill Wide Gaps
Run painter’s tape on the tile about 1/8 inch above the joint and on the tub about 1/8 inch below it. If the gap is wider than about 1/4 inch, press foam backer rod into it first so the caulk does not sink. Tape gives a clean, straight line even if you rarely caulk.
Step 6: Apply the Silicone Bead
Cut the nozzle at a 45-degree angle to about a 1/8-inch opening and push the bead ahead of the tip in one steady pass per wall. Pushing forces caulk into the gap better than pulling. Release trigger pressure at the end of each run to avoid a blob.
Step 7: Smooth and Pull the Tape
Tool the bead with a smoothing tool or a gloved finger dipped in soapy water, using one continuous stroke. Remove the tape immediately by pulling it away from the bead at an angle. If you wait until the silicone skins over, the tape tears the edge.
Step 8: Let It Cure Before Draining
Leave the water in the tub and avoid showering until the caulk cures, typically 24 hours; follow the time on the tube. Then drain the tub. In practice, keeping the bathroom ventilated during cure prevents early mildew spots.
Bottom line: use 100% silicone on a clean, dry joint with the tub full of water, and give it a full day before use.
Silicone vs. Acrylic Caulk for a Fiberglass Tub
| Feature | 100% silicone | Siliconized acrylic (latex) |
|---|---|---|
| Flexibility | Excellent | Moderate |
| Water resistance | Excellent | Good |
| Ease of tooling and cleanup | Harder, needs solvent | Easy, water cleanup |
| Paintable | No | Yes |
| Best for | Tub-to-tile joints | Dry trim and painted surfaces |
If That Didn’t Work
Problem: The new bead peeled off in strips. Cause: Old silicone residue or moisture in the joint. Fix: Remove it, clean with alcohol, dry overnight, and recaulk.
Problem: The caulk cracked along the tub edge. Cause: The tub was empty when caulked, or it flexes from a poor base. Fix: Recaulk with the tub full; if the tub flexes noticeably, see how a fiberglass bathtub should be installed on a mortar bed.
Problem: Black spots appear under the new caulk. Cause: Mildew was not killed before sealing. Fix: Remove, clean with diluted bleach, dry fully, and recaulk.
Problem: The line is wavy. Cause: No tape or uneven gun pressure. Fix: Recut and retape; a dripless gun helps.
Safety and When To Call a Pro
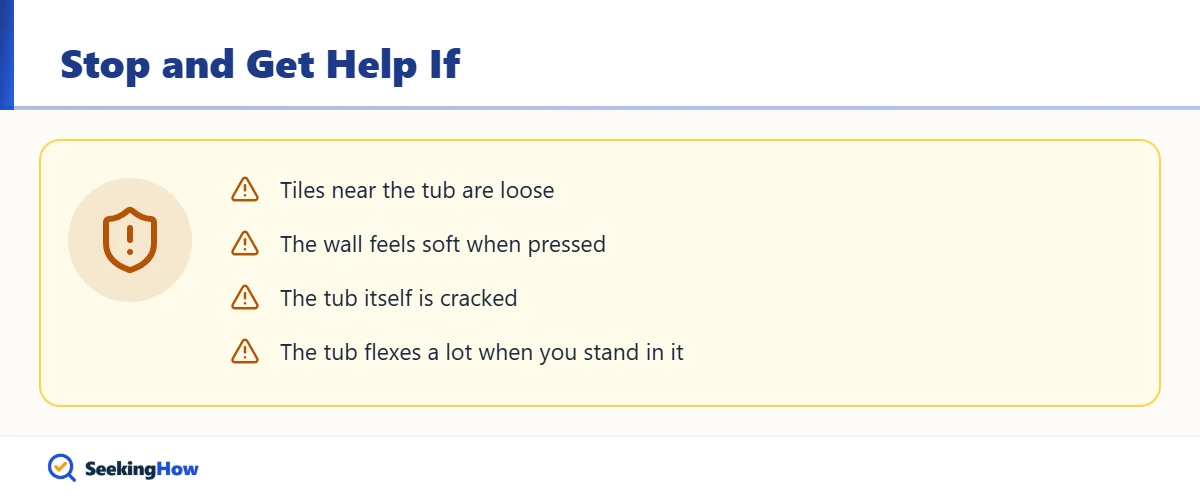
Ventilate the bathroom while using silicone and caulk remover, and wear gloves. Call a pro if tiles near the tub are loose, grout is crumbling, or the wall feels soft when pressed, since water has likely reached the backer board. A crack in the tub itself needs repair before caulking; see how to fix a crack in a plastic bathtub.
Prevention Tips
- Squeegee or wipe the joint after showers so water does not sit on the bead.
- Run the exhaust fan for 20 to 30 minutes after bathing.
- Inspect the bead every six months and spot-repair small gaps early.
- If you get silicone on clothing, act fast; see how to get caulk out of clothes.
Related Guides
- How To Install a Fiberglass Bathtub
- How To Fix a Crack in a Plastic Bathtub
- How To Get Caulk Out of Clothes
- Tub Spout Leaking From the Back
Sources
- DAP, kitchen and bath silicone application guidance (dap.com)
- U.S. Environmental Protection Agency, mold cleanup in your home (epa.gov)
- Tile Council of North America, tile installation resources (tcnatile.com)
Frequently Asked Questions
What is the best caulk for a fiberglass tub?
The best caulk for a fiberglass tub is 100% silicone labeled for kitchen and bath use with mildew resistance. It stays flexible as the tub moves and resists water better than acrylic. Choose a product that lists fiberglass or acrylic tubs as compatible on the label.
Should you fill the tub with water before caulking?
Yes, fill the tub with water before caulking. The weight settles the tub to its loaded position, so the joint is at its widest when the caulk cures. Without water, the bead stretches and tears the first time someone fills the tub or stands in it.
How long should caulk dry before using the tub?
Most silicone caulk needs about 24 hours to cure before showering, though some fast-cure products allow use sooner. Follow the time printed on the tube. Cool, humid bathrooms slow curing, so add time if the room stays damp.
Can you caulk over old caulk on a tub?
No, do not caulk over old caulk on a tub. New silicone does not bond well to old silicone, and mildew trapped underneath keeps growing. Remove the old bead completely, clean with isopropyl alcohol, and let the joint dry before applying new caulk.
How do you fill a large gap between a tub and the wall?
Fill a gap wider than about 1/4 inch with foam backer rod first, pressed slightly below the surface. Then caulk over it. Backer rod controls bead depth, saves caulk, and lets the silicone flex properly instead of cracking.
Clear or white caulk for a tub and tile?
White caulk usually looks cleaner against a white fiberglass tub and light tile and hides small imperfections. Clear caulk shows dirt and mildew underneath more easily. Match the grout or tub color when possible for the neatest result.
Why does my tub caulk keep cracking?
Tub caulk keeps cracking when the tub flexes, when it was applied with the tub empty, or when acrylic caulk was used. Recaulk with 100% silicone and the tub full of water. If cracking continues, the tub may lack proper support underneath.