
Quick Answer
To fix a wobbly IKEA Kallax, tighten every cam lock a quarter turn, level the unit with shims, and add a thin hardboard back panel screwed or nailed to the frame to stop side-to-side racking. Anchor the IKEA Kallax to the wall with its tip-over restraint. The full fix takes about an hour and needs only a screwdriver and drill.
Key Takeaways
- The IKEA Kallax has no back panel, so nothing resists sideways racking except its cam locks and dowels.
- Loose cam locks are the most common cause of Kallax wobble and take minutes to fix.
- A 1/8-inch hardboard back panel is the single most effective fix for a Kallax that sways side to side.
- Uneven floors and carpet make the unit rock; shims or a flat base solve that.
- IKEA’s instructions call for anchoring Kallax to the wall to prevent tip-over.
- Overtightening cam locks strips the particleboard and makes wobble worse.
Kallax shelves are sturdy for their price, but they often start to sway after a move, a heavy load of records, or a few months on carpet. This guide shows how to fix a wobbly IKEA Kallax by finding which kind of wobble you have and applying the right fix, from a 5-minute cam-lock check to adding a back panel.
What You’ll Need
- Phillips and flat screwdrivers (or the IKEA hex key and cam tool)
- Level (24-inch) and plastic or composite furniture shims
- 1/8-inch hardboard or 1/4-inch plywood, cut to the unit’s back dimensions
- #6 x 5/8-inch pan-head wood screws or 3/4-inch brads, plus a drill
- Wood glue (optional, for permanent dowel joints)
- L-shaped corner brackets with short screws (optional)
- IKEA wall-anchoring fitting plus screws and anchors suited to your wall (sold separately)
- Stud finder and pencil
How To Fix a Wobbly IKEA Kallax: Step-by-Step
Step 1: Empty the unit and find the wobble
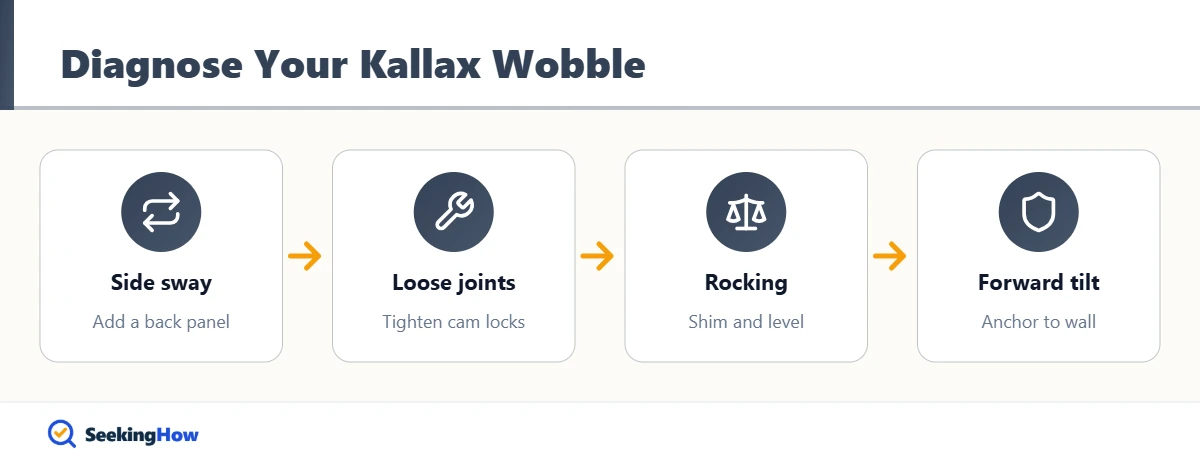
Remove everything and push the top corner sideways, then front to back. Side-to-side sway means racking (loose joints and no back), while front-to-back rocking usually means an uneven floor or a missing wall anchor. Knowing which one you have saves time and money.
Step 2: Tighten all cam locks
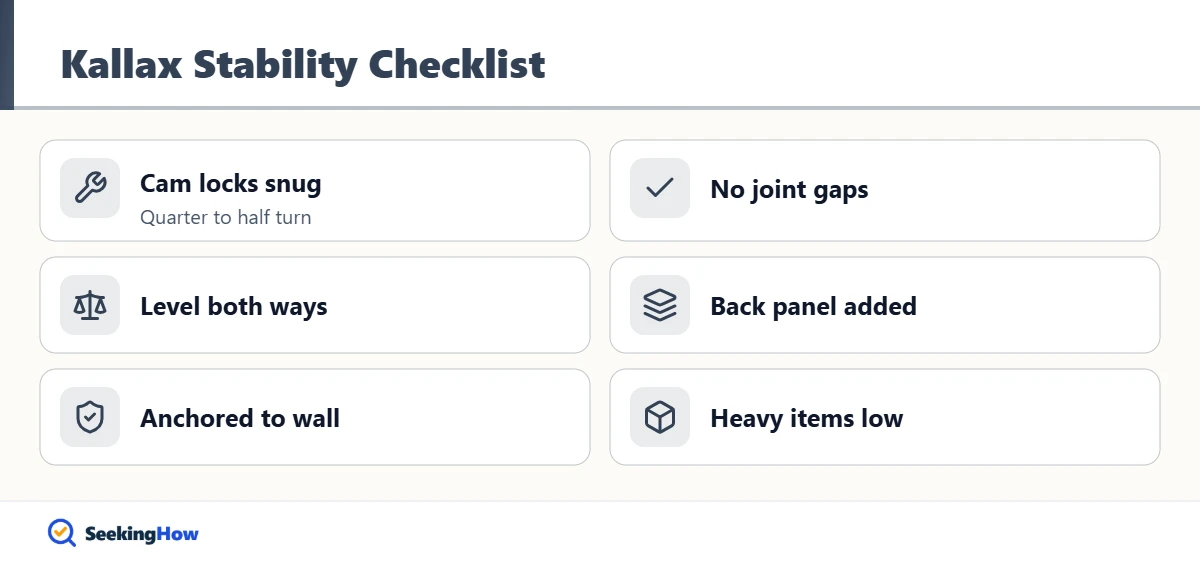
Turn each round cam lock clockwise until it feels snug, usually no more than a quarter to half turn. Cams pull the metal bolts tight against the panels; when they loosen, the whole frame shifts. Stop when you feel resistance, because overtightening crushes the particleboard and the joint will never hold again.
Step 3: Check dowels and shelf alignment
Look for gaps between shelves and side panels. If a joint has a gap, loosen its cams, press the panels together, and retighten. For a permanent fix, add a drop of wood glue to dowels during this step, but only if you do not plan to take the unit apart again.
Step 4: Level the base
Set a level on the top and check both directions. Slide composite shims under the low corners until the bubble centers. On carpet, a plywood base or IKEA-compatible legs give a firmer footing than carpet pad, which compresses unevenly over time.
Step 5: Add a back panel
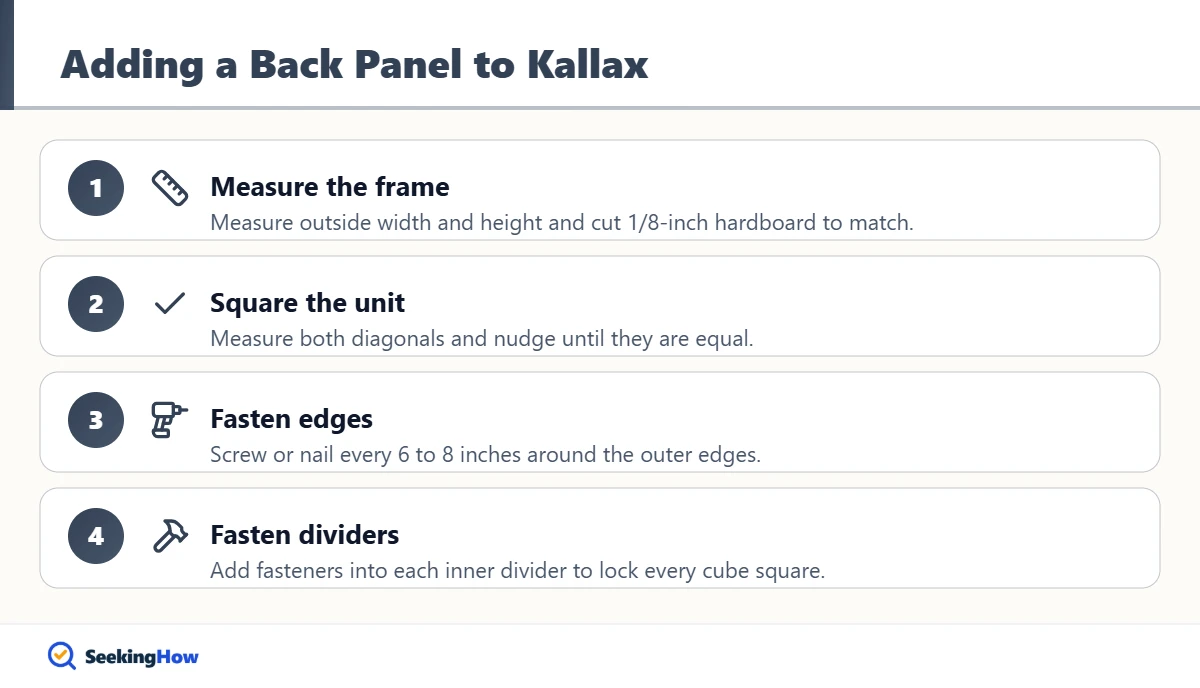
Cut hardboard to the outside dimensions of the unit, square it with the frame, and fasten it with short screws or brads every 6 to 8 inches into the outer edges and the inner dividers. A square back panel locks the frame into a rectangle, which stops side-to-side racking almost completely. In practice, most people find this one step turns a swaying Kallax into a rock-solid unit.
Step 6: Anchor to the wall
Attach the included wall-anchoring fitting to the top of the unit and screw it into a stud or a wall anchor rated for your wall type. IKEA requires wall anchoring because a loaded shelving unit can tip forward if a child climbs it or drawers are pulled. Anchoring also eliminates any remaining front-to-back rocking.
Bottom line: Tighten cams for minor wobble, add a back panel for side sway, and always anchor the unit to the wall.
Extra Fixes for Heavy Loads
Large Kallax units holding vinyl records or books carry a lot of weight. Small L-brackets screwed into the inside corners of a few cubes add stiffness without blocking storage. Keep screws short enough that they do not break through the thin hollow-core shelves. For more no-drill bracing ideas, see how to stabilize a bookshelf without drilling.
If That Didn’t Work
Problem: A cam lock spins without tightening. Cause: Stripped bolt hole in the particleboard. Fix: Fill the hole with wood glue and a hardwood dowel, let it cure, and redrill, as covered in our stripped-screw guide.
Problem: The unit still sways after adding a back. Cause: Back panel not square or too few fasteners. Fix: Square the frame by measuring diagonals, then add fasteners into every divider.
Problem: The Kallax rocks on a hard floor. Cause: Uneven floor or warped bottom panel. Fix: Shim each low corner and add felt pads to prevent sliding.
Problem: A shelf sags in the middle. Cause: Overloading the hollow-core shelf. Fix: Redistribute heavy items to lower cubes and avoid stacking heavy items on the top surface.
| Fix | Time | Cost | Solves |
|---|---|---|---|
| Tighten cam locks | 10 minutes | Free | Mild wobble |
| Shim and level | 15 minutes | Low | Rocking on uneven floors |
| Back panel | 45 minutes | Low to moderate | Side-to-side racking |
| Corner brackets | 30 minutes | Low | Extra stiffness under heavy loads |
| Wall anchor | 15 minutes | Low | Front-to-back rocking and tip-over |
Safety and When To Call a Pro
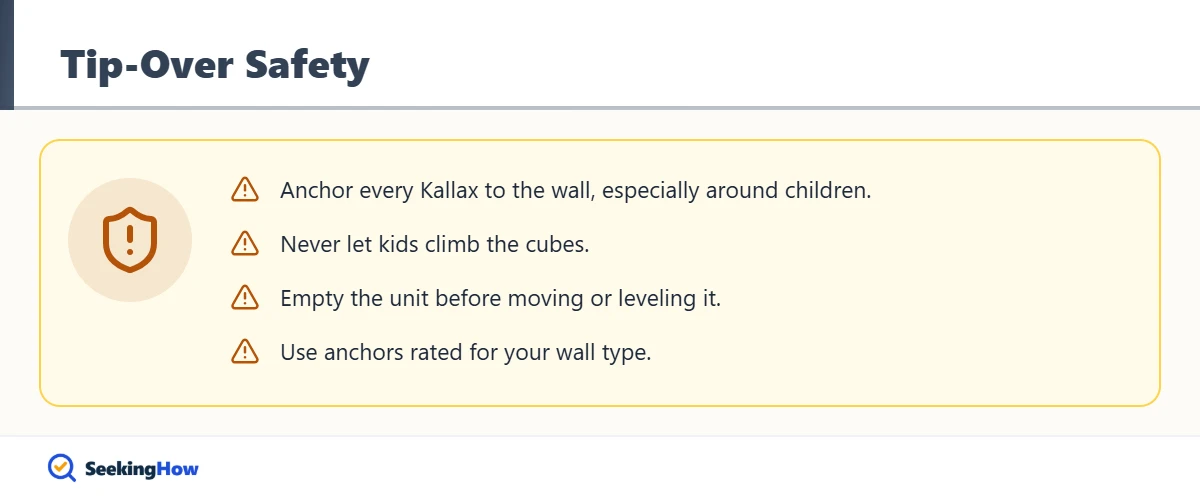
Furniture tip-overs injure and kill young children every year, so anchor every Kallax to the wall, especially in homes with kids, and never let anyone climb the cubes. Empty the unit before moving or leveling it; a fully loaded 4×4 Kallax is very heavy and can fall on you.
Call a handyman if your wall is plaster, brick, or metal stud and you are unsure which anchor to use, or if several joints are stripped and the unit needs rebuilding. Replace panels that are swollen from water damage, since swollen particleboard will not hold fasteners.
Prevention Tips
- Recheck cam locks every 6 to 12 months and after any move.
- Put the heaviest items in the bottom row.
- Keep the unit off wet floors; particleboard swells and loses strength.
- Move a Kallax empty, lifting it rather than dragging it.
Related Guides
- How to stabilize a bookshelf without drilling
- How to stabilize a wobbly cabinet
- How to remove a stripped screw from wood
- How to repair particle board water damage
Sources
- IKEA: product support, assembly instructions, and wall anchoring
- U.S. Consumer Product Safety Commission, Anchor It!: furniture tip-over prevention
Frequently Asked Questions
Why is my IKEA Kallax wobbly?
An IKEA Kallax is usually wobbly because its cam locks have loosened or because it has no back panel to resist sideways racking. Uneven floors and carpet can also make it rock. Tightening cams, shimming, and adding a thin back panel fix nearly every case.
Does the IKEA Kallax come with a back panel?
No, the IKEA Kallax does not come with a back panel. Its open back makes it usable as a room divider but also less rigid. Adding a 1/8-inch hardboard or 1/4-inch plywood back cut to size is the most effective way to stop side-to-side sway.
Do you have to anchor a Kallax to the wall?
Yes, IKEA instructs owners to anchor the Kallax to the wall to prevent tip-over. The unit includes a wall fitting, but screws and anchors must match your wall type and are bought separately. Anchoring is especially important in homes with young children.
Can I glue a Kallax together to stop wobbling?
Yes, you can glue the dowels with wood glue during reassembly for a stiffer, permanent unit. The trade-off is that you will not be able to take it apart for moving without damage. Glue alone does not replace a back panel or wall anchor for heavy loads.
How do I fix a stripped cam lock hole in a Kallax?
Fill the stripped hole with wood glue and a snug hardwood dowel or toothpicks, let the glue cure overnight, then trim flush and drill a new pilot hole. For badly damaged areas, a two-part wood filler designed for particleboard can rebuild the hole.
Can a Kallax be used as a room divider without wobbling?
Yes, but a freestanding Kallax divider needs extra support. Bolt two units together, attach a base board, or secure one end to a wall or ceiling with a bracket. Keep heavy items in the bottom row so the center of gravity stays low.
How much weight can a Kallax shelf hold?
IKEA lists the maximum load per shelf on its product information page and assembly instructions, which you should check for your size. Shelves are hollow-core, so concentrated heavy loads can cause sagging. Spread weight evenly and keep the heaviest items in the lowest cubes.